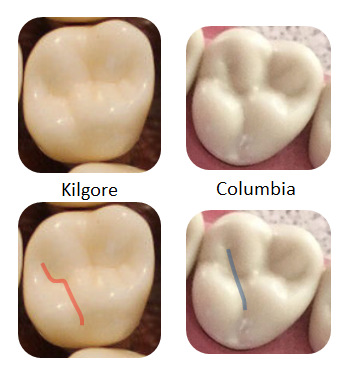
The preparation of this section is fairly easy because all you have to do is to make a class 1 preparation without crossing over the oblique ridge. However, you have to consider the difference of the distal anatomies of both Kilgore and Columbia typodonts. Columbia is more straight and Kilgore slopes distally. Columbia follows the more established ideal form of the disto-occlusolingual groove
Columbia vs. Kilgore Anatomy
Add video here
Step by Step (Kilgore)
The OL preparation is fairly simple. It’s something like a straight line that’s 1mm wall. The depth is 1.5 on the occlusal part, and 1mm on the lingual segment. The lingual segment is shallower because this part of the tooth is not a load bearing area.
Just remember to slope along with the natural rise and fall of the tooth, both on the occlusal and lingual. And round out the axiopulpal line angle.
Demonstration for the Kilgore typodont that we already made:
Add video here
- Visualize and plot in the developmental groove. Notice that the occlusal portion of anatomy slopes distally.
- Punch cut with the use of #330 bur, then extend the preparation towards the buccal. On the distal marginal ridge, do not forget to tilt your bur a little to the distal because this wall should be slightly diverging.
- When extending to the lingual area, adjust your bur according to the high and lows of the area. If you maintain your bur all throughout, you’ll be reducing too much structure in this area. So be careful.
There are two ways to angulate your bur in the lingual. One is directing your bur apically (as like you are preparing the occlusal surface) or positioning your bur perpendicular to the lingual surface. Either way is correct.
The depth in this area is 1mm.
- Flat occlusal floor with a #56 Bur.
- Using hand instruments, bevel the axiopulpal line angle.
Occlusolingual Preparation (Columbia)
Add video here