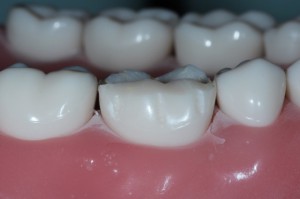
Chamfer margins are indicated for the preparation of full gold crowns and the lingual portion of a metal-ceramic crown. A chamfer margin should be smooth and distinct and allow for 0.5mm thickness of the material. This conserves tooth structure but still creates space for adequate bulk of the material. This margin is relatively easier to make and thus provide a good start to practice before doing a shoulder.
- Chamfer width is only at 0.5mm. Half of the diameter of the bur will just be enough to create that width.
- High chance of creating enamel lips when you fully engage the whole diameter of the tip. This unsupported enamel is a very grave mistake in the bench test. Also, in this manner you are more likely doing a deep chamfer already.
I’m showing you the most classic way of reducing the axial walls using depth grooves. Personally I may give depth grooves for shoulder margins but not so much for chamfers; sometimes it’s hard to get rid of the mark it leaves.
Step by Step
This is a step by step video demo on a lower first molar prep for full gold crowns. The tricky thing about reducing the axial walls of a lower first molar is that the crown has a lingual tilt, so same as with Class II prep on a lower molar, the bur angulation should have also have a lingual tilt as well.
The occlusal reduction has already been done already. To watch the occlusal reduction of this tooth, please refer to this following page:
Link “Occlusal Reduction Lower Molars“
Step 1: Orientation Grooves
Make orientation grooves just to make sure that will tell you to keep your according to the angulation of the crown of the tooth. Make your grooves shallow.
Add demo video
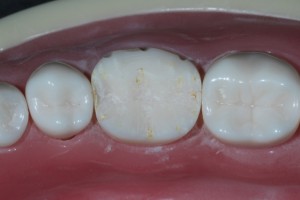
Step 2: Create Chamfer Margins
Make sure to maintain the angulation of the depth grooves (that’s what they’re for).
Add Demo Video
I’m using an 856-018 for reduction. Try experimenting with bur diameter, the margin is smooth right from the beginning when using a larger diameter bur, which takes care of a lot of headaches of smoothening the margin.
Bring your bur in as far interproximally as you can, without nicking the adjacent tooth.
Run with an explorer from occlusal to apical to check whether your explorer stops at the margin. An adequate margin indicates that you can “rest” the tip of your explorer on the margin as you push it downwards.

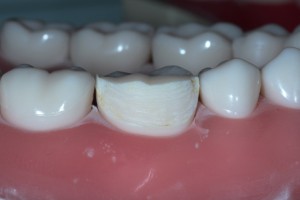
That’s it for Chamfer Buccal Reduction, as for the lingual portion, it runs the same process as above. Refer to this page for the Lingual Reduction.
LINK “Lingual Reduction Full Gold Crowns” page
Step 3: Connecting Depth Grooves
Add demo video here