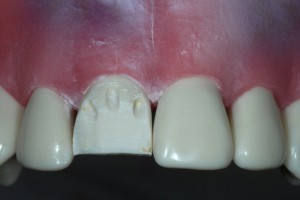
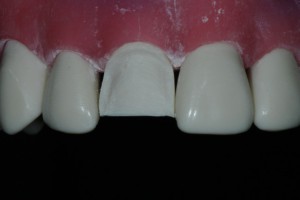
Remember that the finished crown should restore this natural anatomy, and our job is to give sufficient room for material while preserving as much tooth structure as possible.
Step by Step
Step 1: Labial Depth Grooves
The labial surface is reduced in 2 planes: Gingival 2/3 and Incisal 1/3. So the depth grooves will also be given in 2 planes.

The gingival portion of the labial surface has a reference point, depending on whichever you want, the gingival portion actually parallels the long axis OR the general contour of the surface. The incisal 1/3 follows the curvature of the incisal portion of the facial surface.
Step 2: Connecting Depth Grooves
Connect the depth-grooves. I like to start from the incisal half first because when working on the gingival half, there’s a lot more to think about than just connecting the grooves, such as the thickness and location of the margins. Planning off the incisal portion first just makes things cleaner and more accessible.

When working on the gingival half, make sure that the angle of your bur corresponds to your depth groove. While connecting the depth grooves, you must also do your shoulder margins at the same time.

After this is done, now take care of the gingival half along with the margins. Be careful of the angulation of the bur, this wall is going to act as a almost parallel wall against the lingual wall, it’s very easy to get an undercut in either walls.


Keep your margins 1mm supragingival, and follow the contour of the gingiva as it slopes incisally at the line angles.
