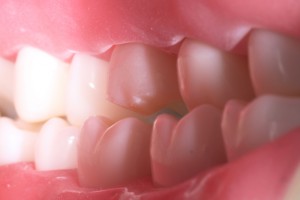
The upper molars has 4 cusps, with the mesiolingual cusp as the largest one and an oblique ridge. The oblique ridge is rather a unique anatomy because it runs somewhat diagonally from the distobuccal cusp to the mesiolingual cusp. The tricky thing here is that most often the location of this ridge gets lost along the way and may shift mesially or distally. When doing so may alter the shape and size of the mesiolingual cusp and the distolingual cusp. Thereby, we really need a very accurate placement of depth grooves here just to make sure that we preserve the size and location of every cusp on this tooth.
Step by Step
Step 1: Visualization and Occlusal Depth Grooves
This is a video showing you how to start off on doing the occlusal reduction
Add video here
Visualize the grooves and the slopes of the cusp. Depth grooves are given on the high and lows of the cusps. For this preparation, any cylindrical bur will do, using #556 bur has the same shape and dimension as #56 but cuts more efficiently because it has serrations. Many schools use #56 rather than #556, so you may or may not have it provided for you during your bench test.
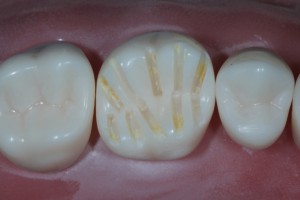
You need to first visualize the angulation of your bur. Rest your bur along the slope of the cusp, making sure that fully rests on the angle of the slope. This is critical because you have to maintain the shape and inclination of the cusp as you reduce it. A common mistake is to make the angle of the bur that is too steep and the tip rests on the central groove. This will make uneven reduction and it seems you will be poking on the central groove making this area a whole lot deeper than the rest of the cusp area. So lift it up away from the groove for about 2-3mm and rest it as parallel as the angle of the slope.

When placing depth groove at the oblique ridge needs to be precise. To give you an insight about this, please look at this video.
Add video here
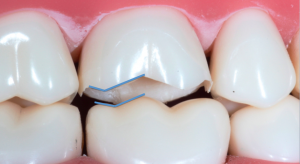
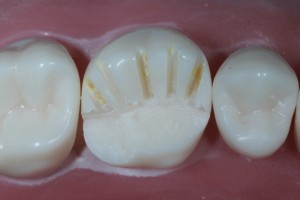
Depth grooves follow the natural anatomy, and given at the deepest and highest points (triangular ridges, developmental grooves). On the lingual aspect, place a depth groove on the highest point of the oblique ridge to mark its location.
Add video here
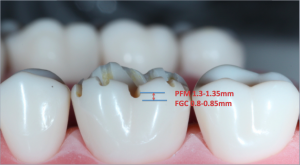
Check the depth with William’s probe. You may also use the diameter of your bur as a reference (0.9mm #56 bur) The depth groove must be at least less than the depth you’re aiming for at the end to accept leeway for adjusting and polishing. You want the depth to be about 0.2 mm less than the depth you’re aiming for at the end.
Take your time to get the depth right! Because after reducing the occlusal surface, checking to make sure the space is adequate is such a pain, and not as reliable as giving definite good depth grooves before starting. This may take time but it’s absolutely worth it, don’t move on from your depth grooves until you are confident in them enough to say that you don’t need to check your occlusal clearance anymore.
Step 2: Connect the Grooves
Now it’s time to connect the grooves!
Add video here
Connect them in rather straight lines. The tricky thing about here is that you must avoid slipping the bur into your depth groove because you may risk of deepening it more. To avoid this, angulate your bur slightly perpendicular to the direction of the slope. Not only this will prevent slipping into the groove, the reduction is faster and more efficient. When you reduce it to some extent, this is the time when you angulate the bur parallel to the slope, making a nice even plane.
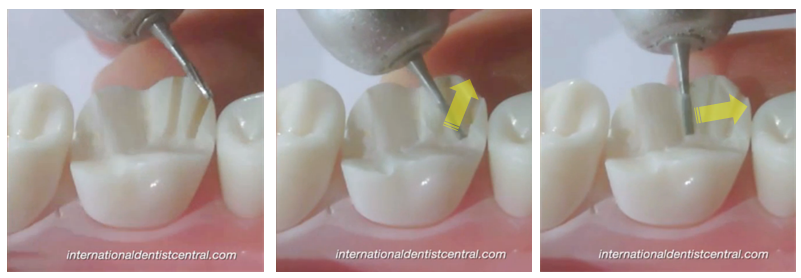
Do not rush on reducing all of the cusp at once, do it one slope at a time, connecting two depth grooves at a time. The direction of your bur should start from the bottom of the cusp towards the cusp tip in sweeping, brushing motion. When you do it all at once, you will you will loose the location of the cusp tip, making the cusp flat all throughout.
This isn’t a rule, but it’s an easy way to make it clear that the occlusal anatomy is conserved, well defined, and it looks impressive.
Step 3: Functional Cusp Bevel
Give depth cuts and connect, just like the other cusps. Extend it all the way into the central groove.
Add video here
This can also be done after axial reduction, but I like to do it now and touch it up once more later. It’s so easy to forget to give it if you leave it till the end.
Remember, without this bevel you cannot achieve adequate occlusal clearance!
Step 4: Check the Clearance
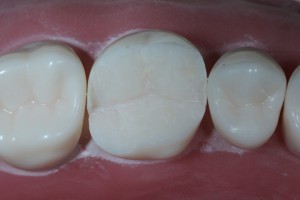
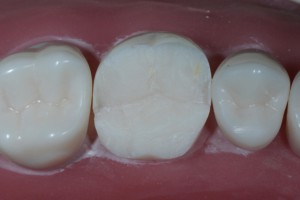
Note how it slopes up and down nicely with the opposing tooth. The reduction space is even.