There are two ways 2 ways of approaching the occlusal portion of a Class II preparation on a lower molar. Since you have yet to obtain the feeling of doing a prep, we firmly recommend you to do the traditional method. Most of the students do less mistakes if they use the traditional (classical) method. If you feel that you have advanced more in terms of skills, you may try the alternative method.
Classical Approach
Step by Step
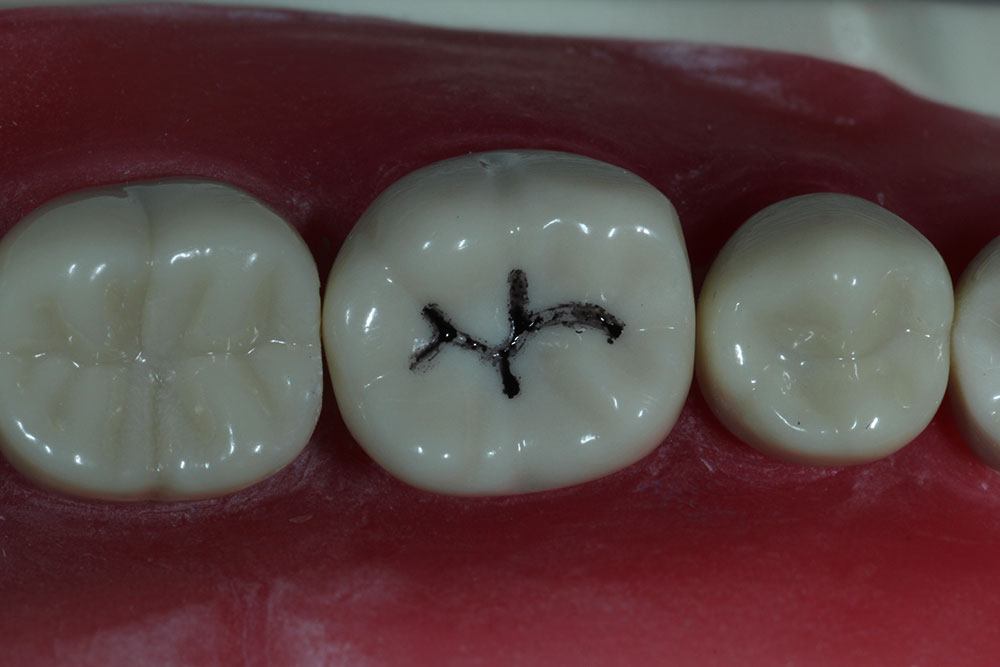
- First visualize. If you want to have a clearer image on the tooth, draw along the major grooves.
[insert video here]
- With the #330 bur, put a punch cut in the central fossa. Start with about 0.2-0.25 mm short of the #330 bur (1.35-1.4mm)
[insert video here]
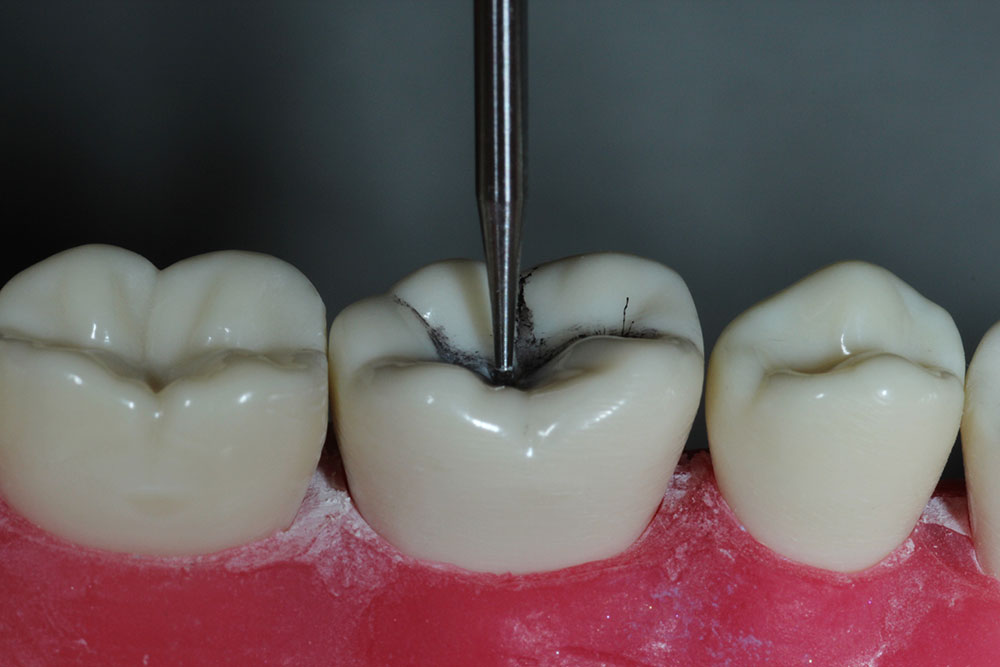
- Maintaining the depth, go along the central groove mesially and distally. Keep your pressure light, keeping the tip of the bur slightly touching the floor, and go back and forth several times (about 1mm distance) while cutting. If not it will burn!
- Extend into developmental grooves, 2 towards the buccal side, and 1 towards the lingual side.

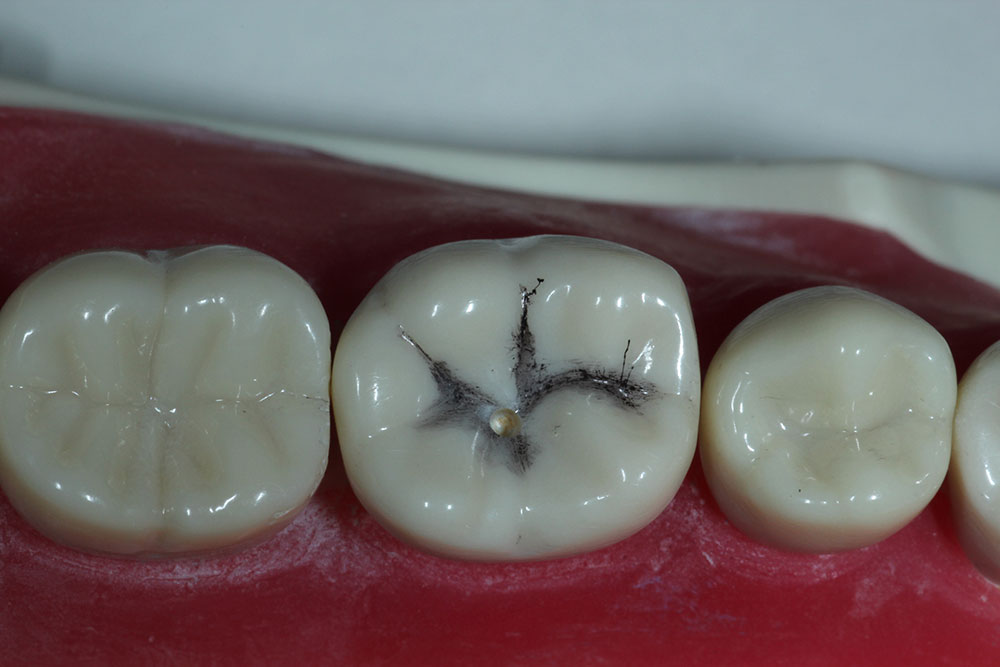
- Now you are left with an outline form that has sharp angles, round-off the sharp angles still using a 330 bur. Then use a #56 to flatten and smoothen the floor. Note that do not touch the walls and the cavosurface margin to maintain the convergence that the 330 bur had done.
[insert video here]
- Check the width of the preparation with a hand instrument, you can also use a #56 (which is better, by the way) to check if the isthmus width is at least 1mm (#56 bur has a diameter of 0.9mm), The instrument should pass the isthmus without binding.
There are discrepancies in terms of sizes and measurements of instruments depending on its brand. However, burs have consistent measurements, so use burs to measure as it is more accurate and also actually more convenient.This will be all for some programs; leaving the distal portion like this without giving a dovetail is called a fishtail.

- While using the #56 bur to measure the isthmus width, you can use it to smoothen-out the pulpal floor. If you have a slow-speed, you can use it here.
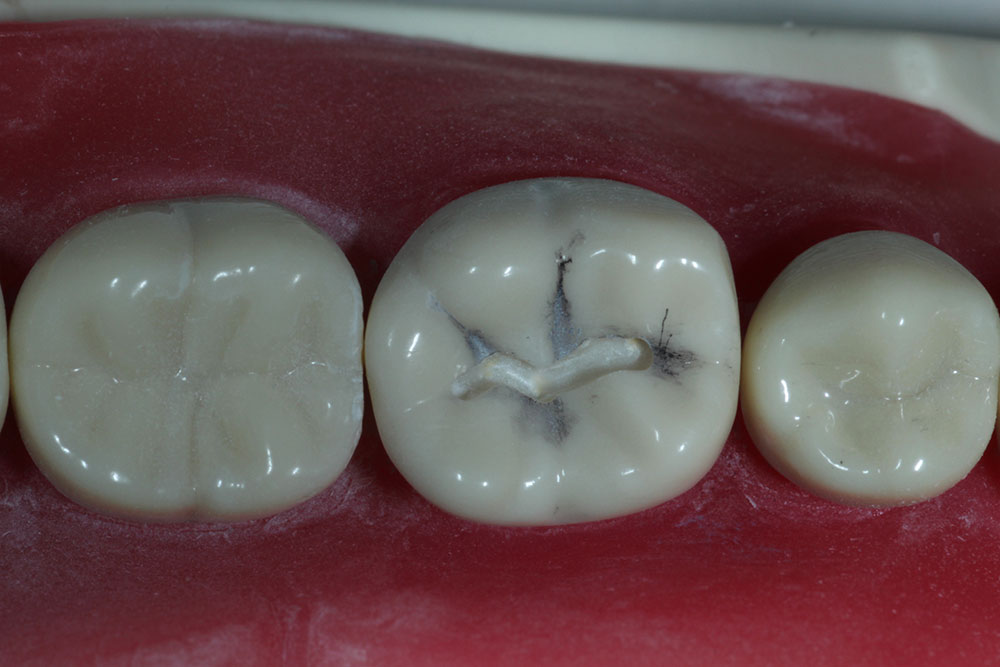
- This video will give you a demo about giving a little dovetail on the distal. Some schools may ask you of a fishtail instead.[insert video here]
Tilt your bur distally when working on the distal wall of the dovetail – this is a divergent, not convergent wall! But not too much causing the marginal ridge to be very thin.I also extended the preparation straight mesially to get ready for the proximal box.
Checking
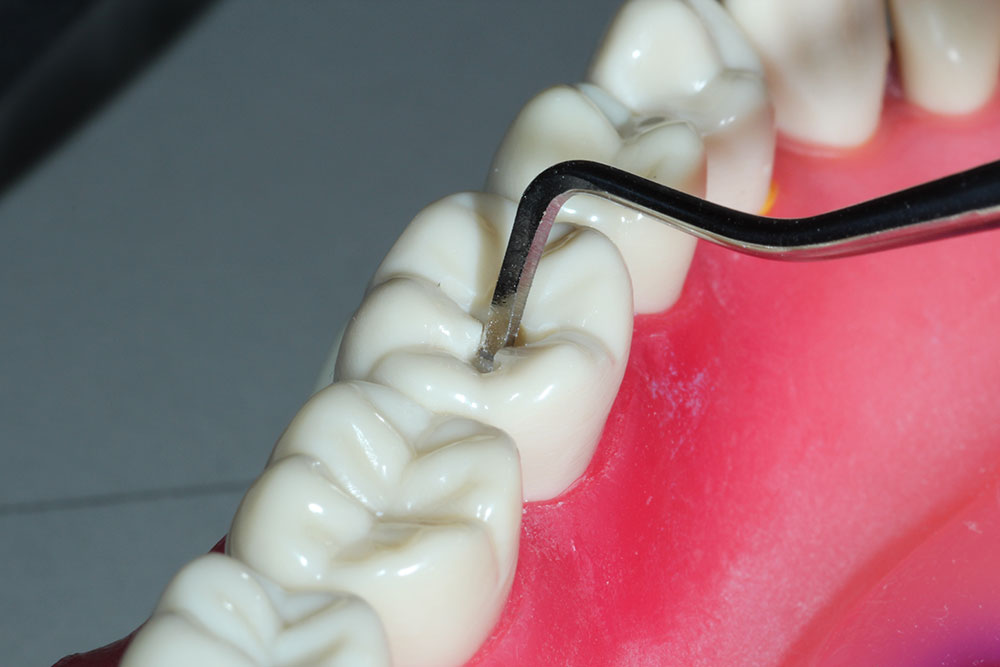
At this point, you are already done with the preparation of the occlusal aspect of class II preparation. Now check everything that you have already made. Then if everything is very smooth and the dimensions are in perfect shape, proceed to visualizing your future proximal box.
[insert video here]
Note the well-defined internal line-angles. When running your explorer from any axial wall to the pulpal floor, if you feel a step bring your bur back and define it.
[insert link here]
